All Posts By

Will

Will manages the business on a day-to-day basis, responsible for a sales and demonstration team; operations and is the primary contact for pre-sales support.

Video Meeting Troubleshooting

By News and Info

There are three main errors which may occur:

“Cannot access your device due to a hardware error”

This means the webcam/mic are not ‘available’ for your internet browser to use.

Potential solutions:

  1. If you did not ‘allow’ permission for your webcam or microphone to be used when prompted, you can use the blue ‘Video Settings’ button on this page to reset your preferences and allow you to approve these.
  2. If you’ve recently had a Teams/Zoom meeting, make sure these are closed (even try a CTRL+AT+Delete to close them, or a computer restart). You may need to try a different computer/smartphone/tablet if you can’t find the cause to this error.
  3. Lastly, make sure that the internet browser your are using does not have a webcam or mic icon in its website address bar which needs clicked on to ‘allow’ the browser to use your webcam/microphone.

If you do not have a webcam or microphone ‘installed’ on your computer, please use a different ‘device’ (computer, smartphone or tablet). Video meetings cannot take place without a webcam, or where you do not allow Parents Booking to use your webcam.

“The user did not give permission to access your media”

This often means the internet browser is blocking access to the webcam.

Potential solutions:

  1. Look at your internet browser’s web address bar and check if the video symbol is ‘blocked’. If it is, unblock and refresh the web page.
  2. Press the Video Settings button at the top of the video meeting page and Reset settings. This should give you another chance to approve your webcam and mic’s use by Parents Booking.

A grey box where you should be seeing yourself or the teacher, when the meeting should be taking place:

If your video meeting’s video area is still a grey box, even after your video meeting should have started, this means your computer is not able to connect to the video meeting.

When your video meeting starts, you should be able to see yourself (like a mirror) at least. If this is not the case, and you’re just seeing a grey box, there’s a problem connecting to our video server. This is most likely caused by your internet connection (home or work network) or, perhaps more likely, your firewall ‘blocking’ you joining the video meeting. It could also be your choice of internet browser, or some security settings on your device, but those are less likely.

Potential solutions:

  1. Most likely situation: Your internet connection is blocking the video meeting, possibly because of your home or work firewall. If you think your firewall is strict, and this could be the reason, try using a device which will allow you to connect to the internet outside of your firewall, e.g. using 3G or 4G mobile data, to see if there’s a difference, and if so you know it’s your internet/network connection/firewall.
    1. You could also try running the Twilio Network Test, which does take a moment or two. You can afford one of the top two items to fail, but not both. Similarly, you can afford one of the bottom two tests to fail, but not both. If 3 or 4 of these top two and bottom two tests are failing, it is a network/firewall issue, and the only solutions will be to NOT use the internet connection you’re on currently, or try to unblock your firewall if you feel confident in trying to do so. You’ll need to whitelist “twilio.com”, and allow the moist local IPs to you found here, e.g. Irish and German IPs if you’re in the UK or Europe, and USA IPs if you’re in America.
  2. Your computer has some other sort of issue stopping it connecting (in which case we would recommend you try a different device, e.g. smartphone, tablet, computer).
  3. Least likely situation: Use a different internet browser. E.g. Try Chrome instead of Edge, or vice-versa. Its possible you are using an internet browser that is incompatible (or might need ‘updated’)

Parent and/or teacher cannot hear each other

Potential solutions:

Sometimes the microphones on laptops / computers can be in “mute” mode. Hopefully this can be rectified via a setting in the internet browser (near the address bar?), and this is sometimes ONLY found when looking via “Classic control panel” could this be seen:

Steps:

  • search cpanel
  • find sound
  • go to recording tab
  • right click view properties of device
  • then go to “levels” tab and the button was on mute.

Creating a .CSV file to upload your school’s pupils, parents and classes

By News and Info

Schools who use MIS/SIS databases that do not integrate with Parents Booking can create a custom .CSV file that can be uploaded. This blog post features instructions on how to create your own .CSV upload.

This two-spreadsheet approach involves linking two spreadsheets using pupil, parent and teacher IDs.

Spreadsheet 1 lists all of the pupils and parents, while spreadsheet 2 links the students to their classes and creates the teachers’ accounts (using the student ID number to link both spreadsheets).

To begin with, please download our spreadsheet 1 template and our spreadsheet 2 template. These are vital to your success.

The data fields required for spreadsheet 1 are:


  • Student ID
  • Student Forename
  • Student Surname
  • Student Name (this field is [forename] + [surname] typically. Do not use commas.)
  • Student Date of Birth
  • Student Registration Group or Year Group
  • Parent ID
  • Parent/carer Title
  • Parent/carer Forename
  • Parent/carer Surname
  • Parent/carer Mobile/Telephone
  • Parent/carer Email
  • Emergency Priority Number (schools usually denote a ‘Main Contact’ as priority 1, and lower priority parents as 2, 3, 4, etc. If you are uploading multiple parents for a student, you will see in our spreadsheet example that you do this by adding each parent to a new line, with the same student details on each row. Giving one of the parents priority 1 in this column will help us understand who the ‘main contact’ is).
  • Receives Email? (Set everyone to “TRUE” in this column unless you have some parents who do not wish to be contacted by email, in which case set them to “FALSE”).

You can list a pupil on two different rows to link them to 2nd parent/carer.

Rules: Do not extract parent/carers who do not have “parental responsibility” / legal rights.

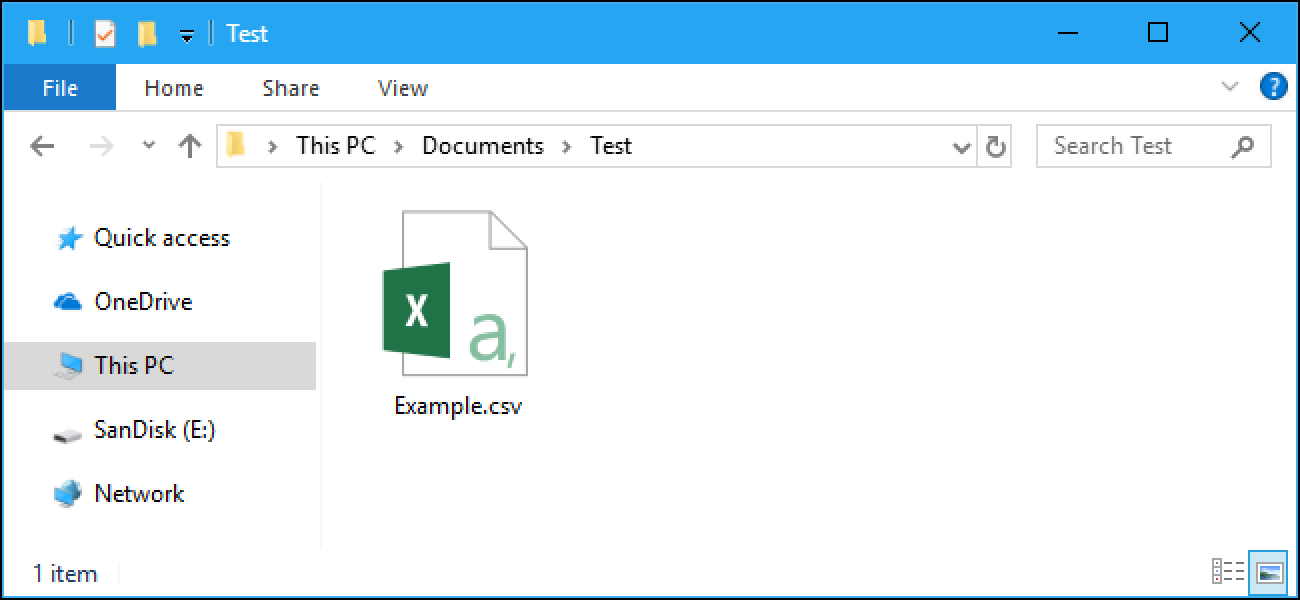
Save this spreadsheet as a .CSV file (in UTF-8 Format if possible) by going to File > Save As.. and underneath the file name choose “.CSV UTF-8 (Comma Delimited)”.

The data fields required for spreadsheet 2 are:


  • Student ID
  • Teacher ID
  • Teacher Title
  • Teacher Forename
  • Teacher Surname
  • Teacher’s Email Address
  • Subject Name
  • Class Code

Again, save this spreadsheet as a .CSV file (in UTF-8 Format if possible) by going to File > Save As.. and underneath the file name choose “.CSV UTF-8 (Comma Delimited)”.

These spreadsheets are then uploaded in the following order:


  1. Spreadsheet 1 – Pupils and Parents
  2. Spreadsheet 2 – Classes

Asking for parent phone numbers, for telephone meetings

By Software Updates No Comments

If you would like to use Parents Booking to help facilitate telephone meetings, in the place of ‘in-person’ meetings, or video meetings, we can help.

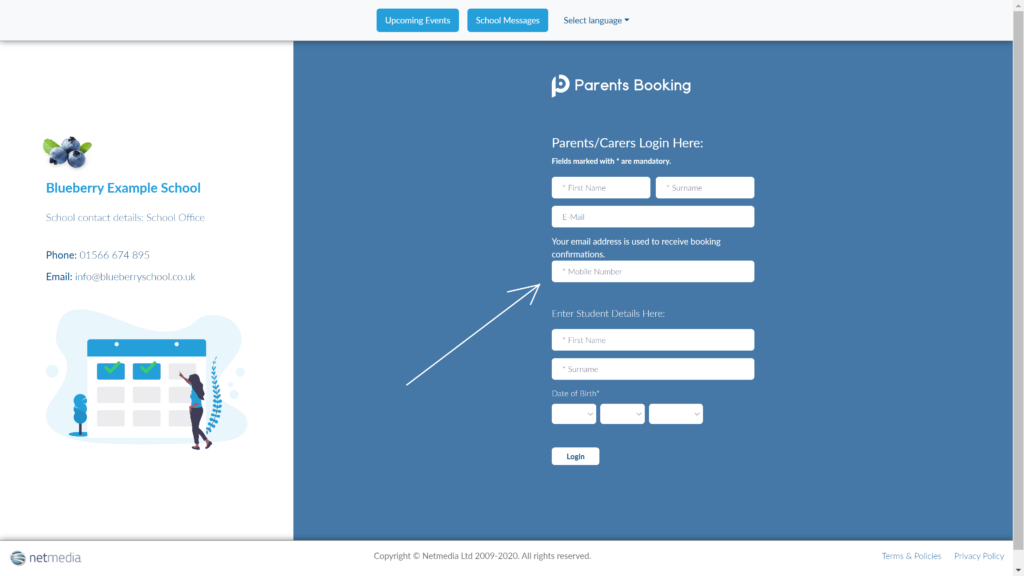
In the Admin Area, go to: Set Up School > Parent Login Method. On this page tick “Mobile Phone”.

This will activate a new field on the parent login page which asks for the parent’s mobile number. The mobile number input by the parent will then show on the teachers’ appointment schedule. Et voila!

Testing / Fixing Video Meeting Technology

By News and Info

Parents Booking uses a video meeting technology called Twilio.com to facilitate its integrated video meetings.

Sometimes schools or parents might have a problem connecting to these video meetings, because unlike Teams, Zoom and Skype, meetings are conducted by an internet browser, and these meetings sometimes need to be “unblocked” by certain work or home networks and firewalls. Furthermore, your computer/device needs to be compatible with the video technology.

Below are three ‘parts’ to this blog, which explain how you can test your device and network/firewall to ensure compliance ahead of a parents’ evening – and we highly recommend Parts 1 and 3 for schools and Part 2 for all users.

Part One:
Run a Network test using the Twilio Network Tester:

This is a great starting point for a school that is going to be using Parents Booking’s video meeting technology (supplied by Twilio.com) for the first time, of if it has recently changed its network/firewall and wants to check the video meeting technology is still compatible.

One school has reported that where there were issues with the camera and mic not working on HP laptops and computers, this was resolved by removing the Cyberlink YouCam application.

https://networktest.twilio.com/

If you have any errors or questions about this test, please review the information in Part Three of this post, and relay it to your school’s IT team.

This network test does not need to show a Pass for all results. So long as one of the top three results, and one of the bottom two are Passes, the video technology should be able to connect teachers to parents on your network. If you are at all unsure, copy the ‘Output Log’ (right hand side of the test) into an email and send, along with your school’s name, to support@parents-booking.com to ask for advice. Also, we recommend using the test below in Part Two before worrying!

Part Two:
A more user-friendly test for yourself and teachers to use:

The below web link will test your device (its webcam and microphone), internet browser and internet connection are all compatible with the Twilio video meeting technology, and will connect to meetings. You can share this with teachers to help them check that they are ready to join our online video meetings.

https://video-diagnostics.twilio.com/ 

Part Three:
Information for your IT/server team on what changes might be required to the network/firewall

Media / UDP Network Settings :

– Schools need to allow Port 443 / HTTPS traffic and IT/network teams should be aware these video calls will happen over an encrypted peer-to-peer (P2P) connection, making any network adjustments required.

– Ensure *.Twilio.com URLs are whitelisted.

– Crucially, we advise whitelisting the most local “media servers” from this list of Twilio IP address ranges. You can also go to your school’s Parents Booking ‘admin area’ > Set Up School page > Preferences page button (bottom left corner, orange button) and choose a region to match the IPs you have whitelisted, rather than using the default “Global Low Latency”, if you want to be certain about which IPs should be whitelisted and will be used.

– Smoothwall/firewall users should add Twilio.com to ‘authentication exceptions’ in Smoothwall’s policies. Some Smoothwall users have also had to modify the’ default outgoing policy’ to allow ‘any internal interfaces’ to access ‘any external interfaces’.

– Our video meetings through Twilio.com generate lots of UDP connections, which school firewalls (or ISP DDOS blocking software) may well be setup to block/drop if they consider them to be a UDP flood attack, and we have seen this on rare occasions. Consider disabling UDP flood protection, or adding Twilio.com as an exception to this part of your firewall, if you find (while using the Twilio Network Test) that the number of UDP connections allowed is much lower than it should be, or if video/audio quality is poor during real video meetings (because these should be crystal clear). Video meetings with anything less than a perfect video, or where the audio and video are not in sync, should be taken as a clue to some sort of disruption caused possibly by a factor such as this.

– We’re also aware that adding chunderw-vpc-gll.twilio.com into to the SSL Inspection exceptions for a firewall has been of significant help to some schools, including those who use Sophos SG UTM as their firewall.

– We are also aware that some schools/local authorities need to ‘allow’ “amazonws.com” to be able to connect to the Twilio servers. We are learning more about why, but assume this is because Twilio use Amazon AWS servers.

– In one case a Scottish local authority has to allow “Dublin.turn.twillio.com” direct out of the firewall, and so this is being noted here in case it is of use for others too.


Information for Edinburgh Council schools:

At the time of writing schools/teachers should not use the LTAD network for their view meetings as this seems to be blocking the video meetings (although it does seem to work at some schools). Please advise teachers to use either the LTAP_P or LT_Open networks.


Information for South Ayrshire Council schools:

We have been asked to make sure schools are aware that software called Zscaler, on teachers’ devices/computers, needs be have a blue icon showing in the bottom right corner of teachers’ Windows task bar, meaning it is enabled. If the icon is grey it has not been enabled and would not allow the video call to take place.


Information for HP Laptops/Computers

One school has reported that where there were issues with the camera and mic not working on HP laptops and computers, this was resolved by removing the Cyberlink YouCam application.

[/vc_column_text][/vc_column][/vc_row]

New parents’ website design

By EdTech Discussion No Comments

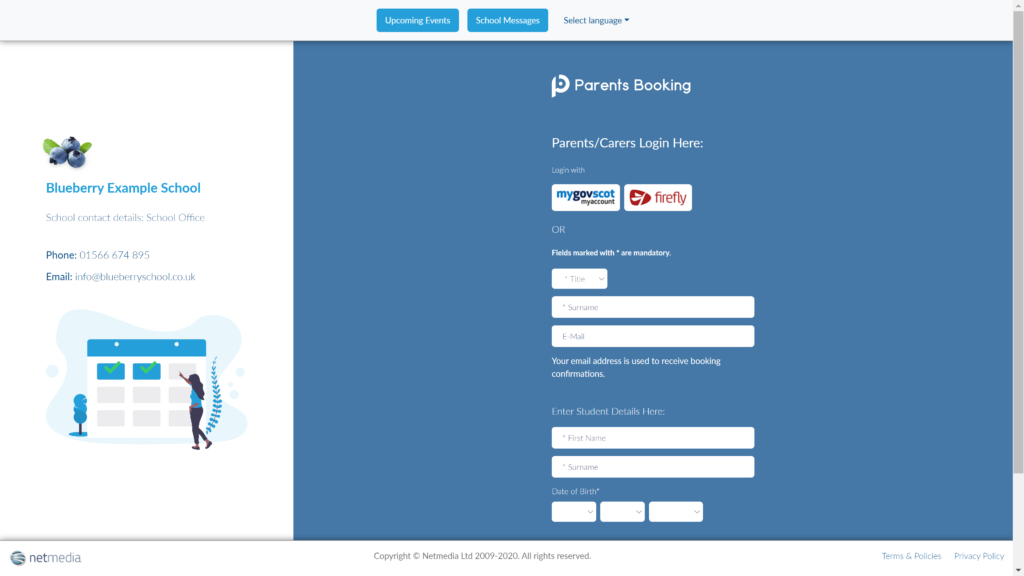
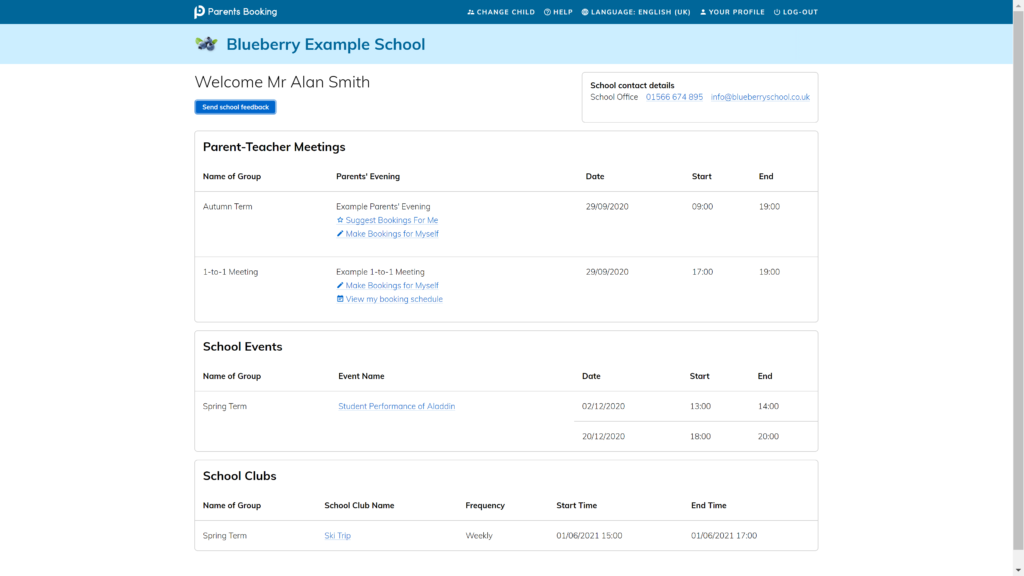
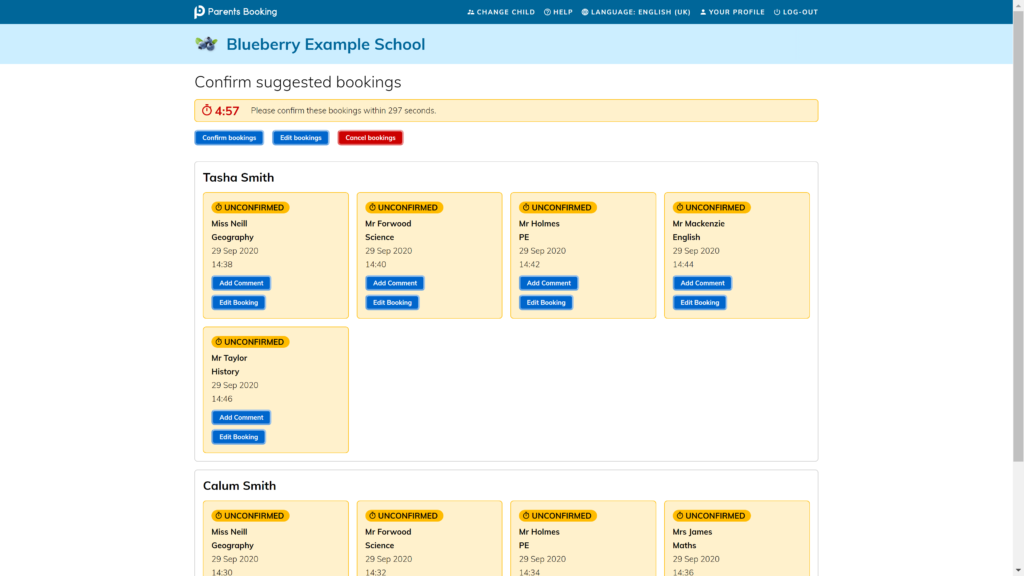
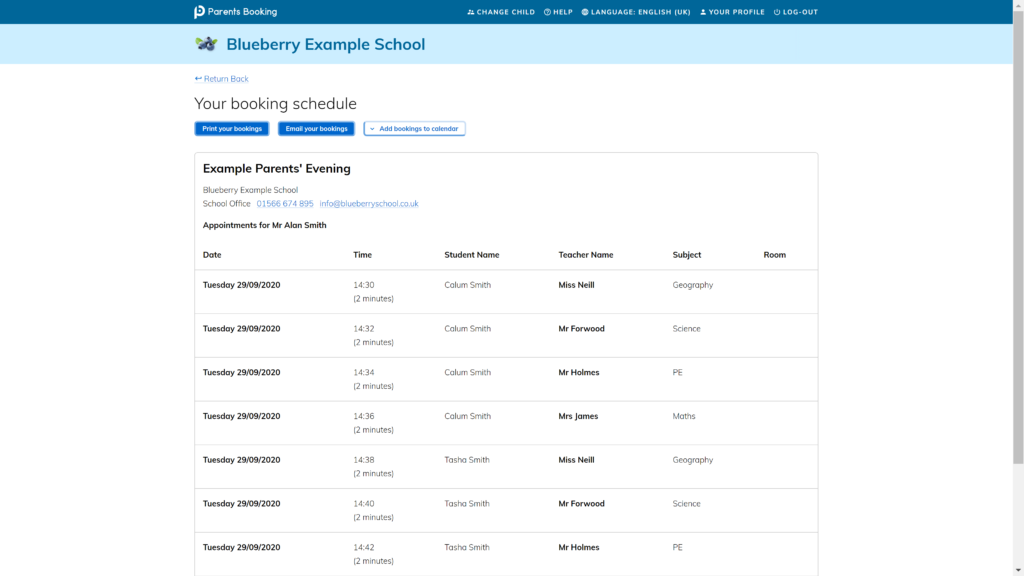
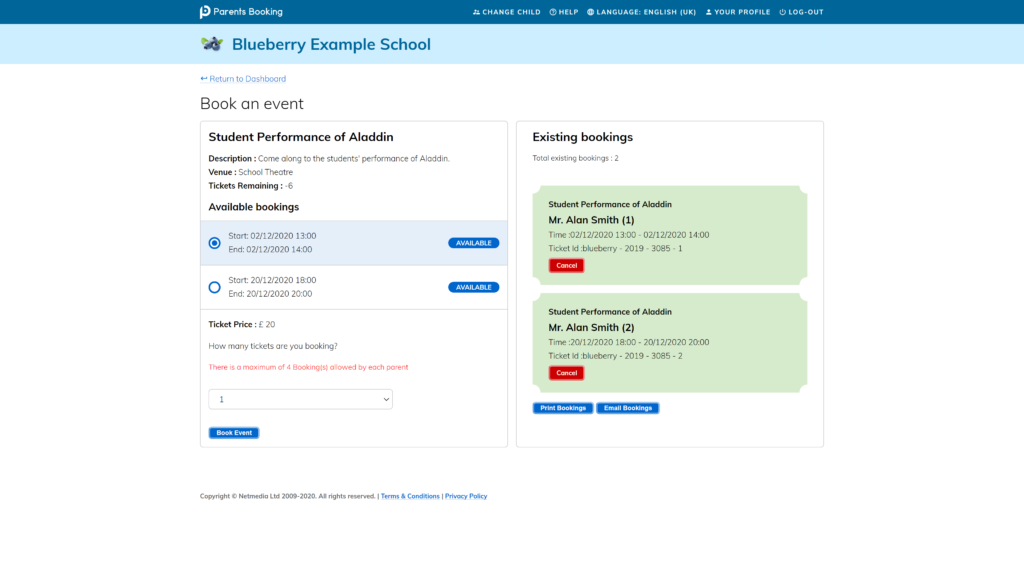
We have recently given the parents’ area a fresh lick of paint. Below are some screenshots which show how some of the website now looks. As well as looking more modern and ‘cleaner’, the website now looks even better at mobile and tablet resolution. We hope you and your parents will appreciate the upgrade!

Setting up a video test ‘session’ between teachers and ‘fake’ parents

By EdTech Discussion No Comments

Use the instructions below to set up a test without having to involve real parents. This testing process suggests diving teachers into two groups (half are to login with their usual teacher login, and half will pretend to be a fake parent):

  1. Login to Parents Booking as an admin
  2. Go to the Parents page and create (or upload, see below) some fake parents, and at the same time create fake students.
    N.B. You do not need to give the fake parents an e-mail or telephone number.
  3. Write down/remember the parent and student names and student DOBs, because the “parents” will use these as their logins later. When creating the students, add them to a new “Test” registration group, this will make the next few steps easier.
    N.B. As an alternative to creating lots of fake students, you can download and then upload this spreadsheet of fake parents (Scottish/SEEMIS schools should use this version).
  4. Go to the Teachers page and add the students from the Test reg group to the teachers who are going to be part of the test (OR make a new, fake teacher and add the students to them).
    N.B. We suggest making a new subject for each teacher called “Video Testing” and adding the ‘Test’ reg group students to this.
  5. Once the students are added to the teachers, make sure the half of the teachers who will be testing by logging in as a teacher have been sent a password or have set up their login. To do this check if the teachers have a e-mail address against their account on the Teachers page.
    If they do, you can skip this step.
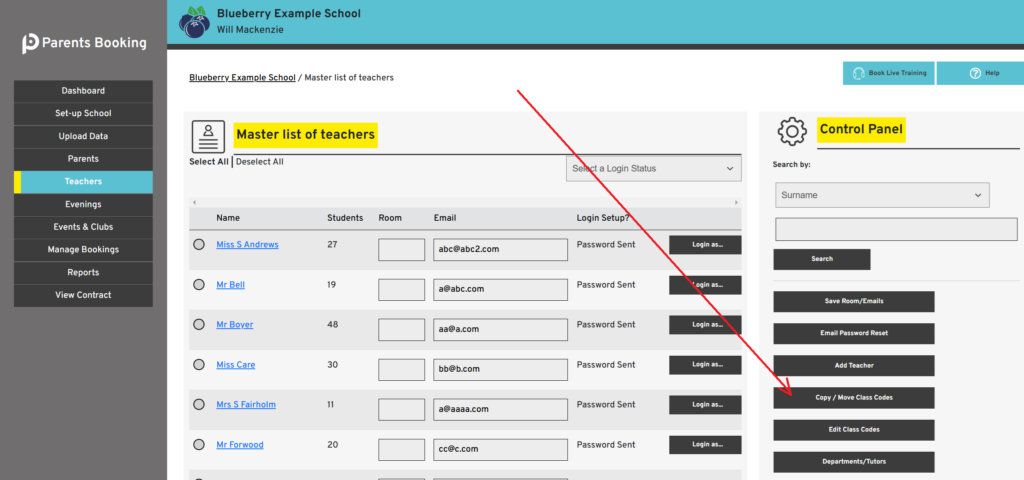
    If they do not, type/paste an e-mail in for these teachers and press ‘Save Rooms/Emails’ at the top of the page to send teachers their login. This will change the ‘Login Setup’ column to a blue Password Sent message. If this is still showing red and ‘Not Configured’ you can tick these teachers and press ‘Email Password Reset’ at the top of the Teachers page.
    N.B. Make sure teachers users log out of Parents Booking, if they were logged in recently as a parent/admin/teacher, before they try to reset their password or they will not be able to set up a password from the link in the e-mail, and instead will see an ‘Access Denied’ page).
  6. Create a parents’ evening for the ‘Test’ registration group, at the dates and times you want to have a test on.
  7. Have the fake parents book some appointments, either via the admin area > Manage Booking or via the school’s parent login page, before the video meetings are scheduled to take place. Meetings which are booked become video meetings, so having bookings between teachers are parents is important.
  8. Then, lastly, have everyone login 5-15mins before their appointments and join the video calls, to make sure the video calls work.

New Features for 2020/21

By Software Updates No Comments

Welcome back!

We have spent the last six months building lots of exciting new features for Parents Booking (which, as you may know, is our new name).

To help explain these changes, this blog article covers them all. You can click on a topic and more information will be opened in a new tab.

List of changes in the latest Parents Booking release:

If you have any questions please do contact hello@knowledge.parents-booking.com or support@knowledge.parents-booking.com.

Disconnect Students from Old Teachers/Classes

By Software Updates No Comments
Disconnect Teachers

Our newest software release showcases a great new feature which automatically “disconnects” students from their old teachers/classes.

Let’s begin with an example: You uploaded the whole school’s data four months ago, and now it’s time for a new parents’ evening (whether that’s just for a year group or the whole school). No doubt class lists will have changed, for example students joining/leaving classes, ‘rotations’ meaning classes are now taught by different teachers, or even staff joining/leaving the school. In the past this might have meant your students and classes were still “linked” to the wrong teacher.

By default, from now on, any data upload you run will automatically “disconnect” students from their “old” teachers and classes. This means that Parents Booking will take for granted that the data you are uploading is the whole and honest truth. This should make parents’ evenings extremely accurate, and mean schools have an even easier time setting up parents’ evenings.

However, be careful. Under certain circumstances, for example if you choose to upload some data for just one subject, the students you upload will be disconnected from all their other teachers/classes UNLESS you un-tick the “Remove students from their old teachers/classes” setting at the top of the Upload Data page, before you run the upload.