
You can move or swap class codes from one teacher to another easily by clicking the ‘Move or Swap Class Codes’ button on the ‘Edit the Teachers’ page (see Dashboard or Evening pages for this).
The video below explains how this works.
Will manages the business on a day-to-day basis, responsible for a sales and demonstration team; operations and is the primary contact for pre-sales support.
You can move or swap class codes from one teacher to another easily by clicking the ‘Move or Swap Class Codes’ button on the ‘Edit the Teachers’ page (see Dashboard or Evening pages for this).
The video below explains how this works.
You can now take payments for events, clubs and trips through Parents Booking’s new integration with Stripe.
The video below demonstrates how this all looks and works, and by going to your school’s Admin Area > Set Up School page, and expanding the Payment Gateway Settings section you can download the latest version of the Stripe integration instructions.
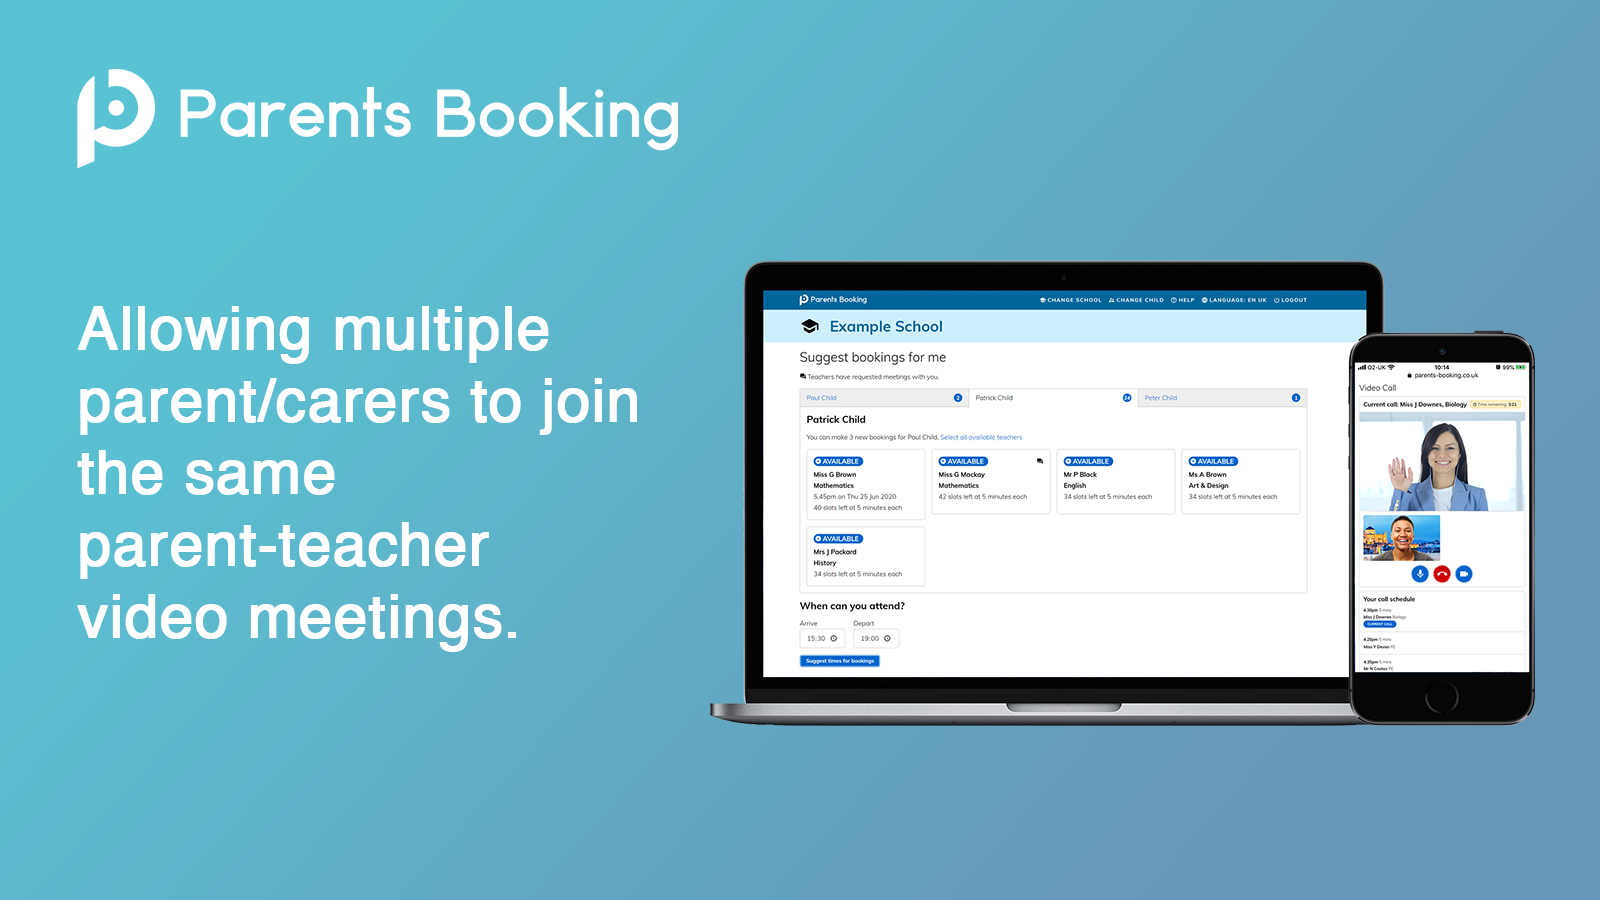
We have recently added a ‘shareable link’ to Parents Booking, for video meetings, meaning that parents can copy and share a link (website address) which will allow other parents, carers or even students to join the video meetings that the original parent has booked.
This ‘shareable link’ will be included in parents’ booking confirmation emails by default as well, making it easy to just share the email, which includes appointment times and the ‘sharable link’, with anyone the parent wants to join their appointments.
The demonstration video below shows how this all works.
Yes, you can.
Parents Booking customers can have 2+ teachers in their video meetings, and one of those ‘teachers’ can be a translator if you like.
Steps:
1. Take all your parents’ appointments like normal
2. After the boking deadline has passed and you know who the translator(s) will be, you can create them an account on the Teachers page. They don’t need any students added to them, they just need a name, subject/department (“Translator”) and email address, which they use to login.
3. Then, on the Manage Bookings page, you can go to each class teacher and tick the bookings you want the Translator to have, and use a new blue button at the top of the page called “Share Bookings” to share them with the translator. This adds the Translator to the parents’ evening and when they login they can join the booking the parent made with the teacher.
Related blog post and video about how to share video meetings with other teachers.
https://knowledge.parents-booking.com/multiple-teachers-same-video-meeting/
Schools can share bookings that have previously been made with one teacher (let’s call them teacher A) with a second teacher (Teacher B). This is really simple to do, and the video and PDF below are both good instructions/resources explaining the process.
Steps:
1. You can share bookings that have already been made with a 2nd teacher at any time, but consider that it might be best to do this after the booking deadline has passed, so you only have to do it once and can do it for all bookings that require sharing.
2. Make sure the teacher you want to share the bookings with has an account on the Teachers page. If they don’t, add them. They don’t need any students added to them, but they do need a name, subject, department and e-mail address (so you can send them a username/password to login with).
3. Go to the Manage Bookings page, fine Teacher A, tick the bookings you want to share, then at the top of the page click Share Booking and share them with Teacher B. If Teacher B was not in the evening, they’ll be added.
Download PDF Instructions Here
Explainer Video:
Do you want to facilitate booking of COVID-19 tests by parents? If so, this is the blog post for you!
Steps:
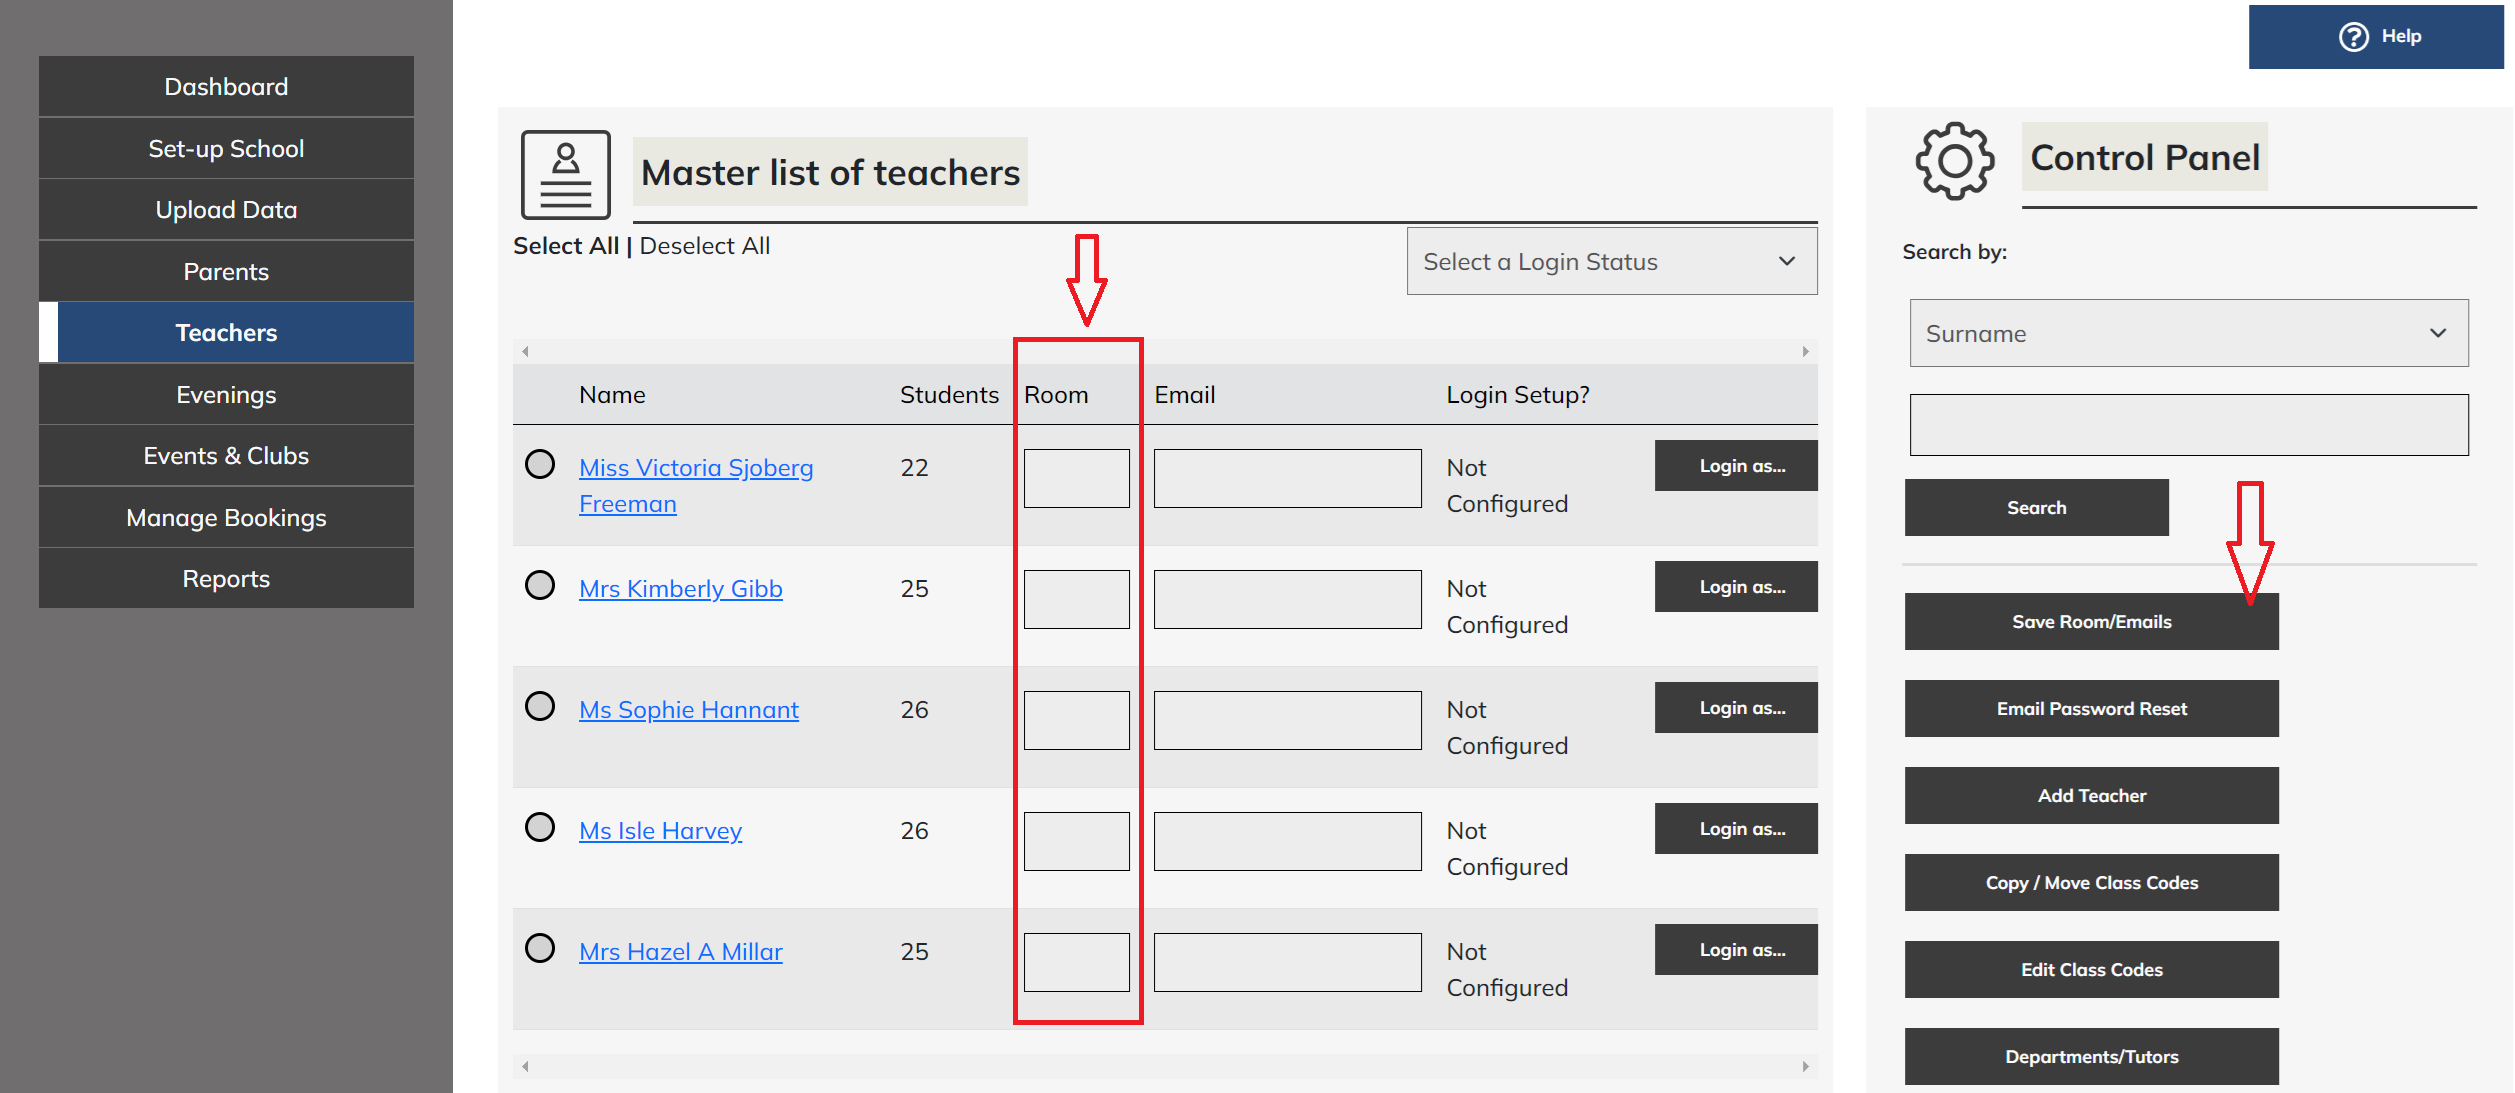
Schools who prefer to use their own video meeting rooms, perhaps with Teams, Zoom or similar, can show the URL for the teachers ‘video rooms’ on parents’ appointment schedules, making it easy for parents to join their video appointments.
School administrators simply need to add URLs for these ‘video rooms’ to the Teachers page in the admin area of Parents Booking and press the “Save Rooms/Emails” button.
Steps:
Go to the Teachers page, paste the Teams/Zoom link into the Room field for each teacher, and press the Save Rooms/Email button in the Control Panel.
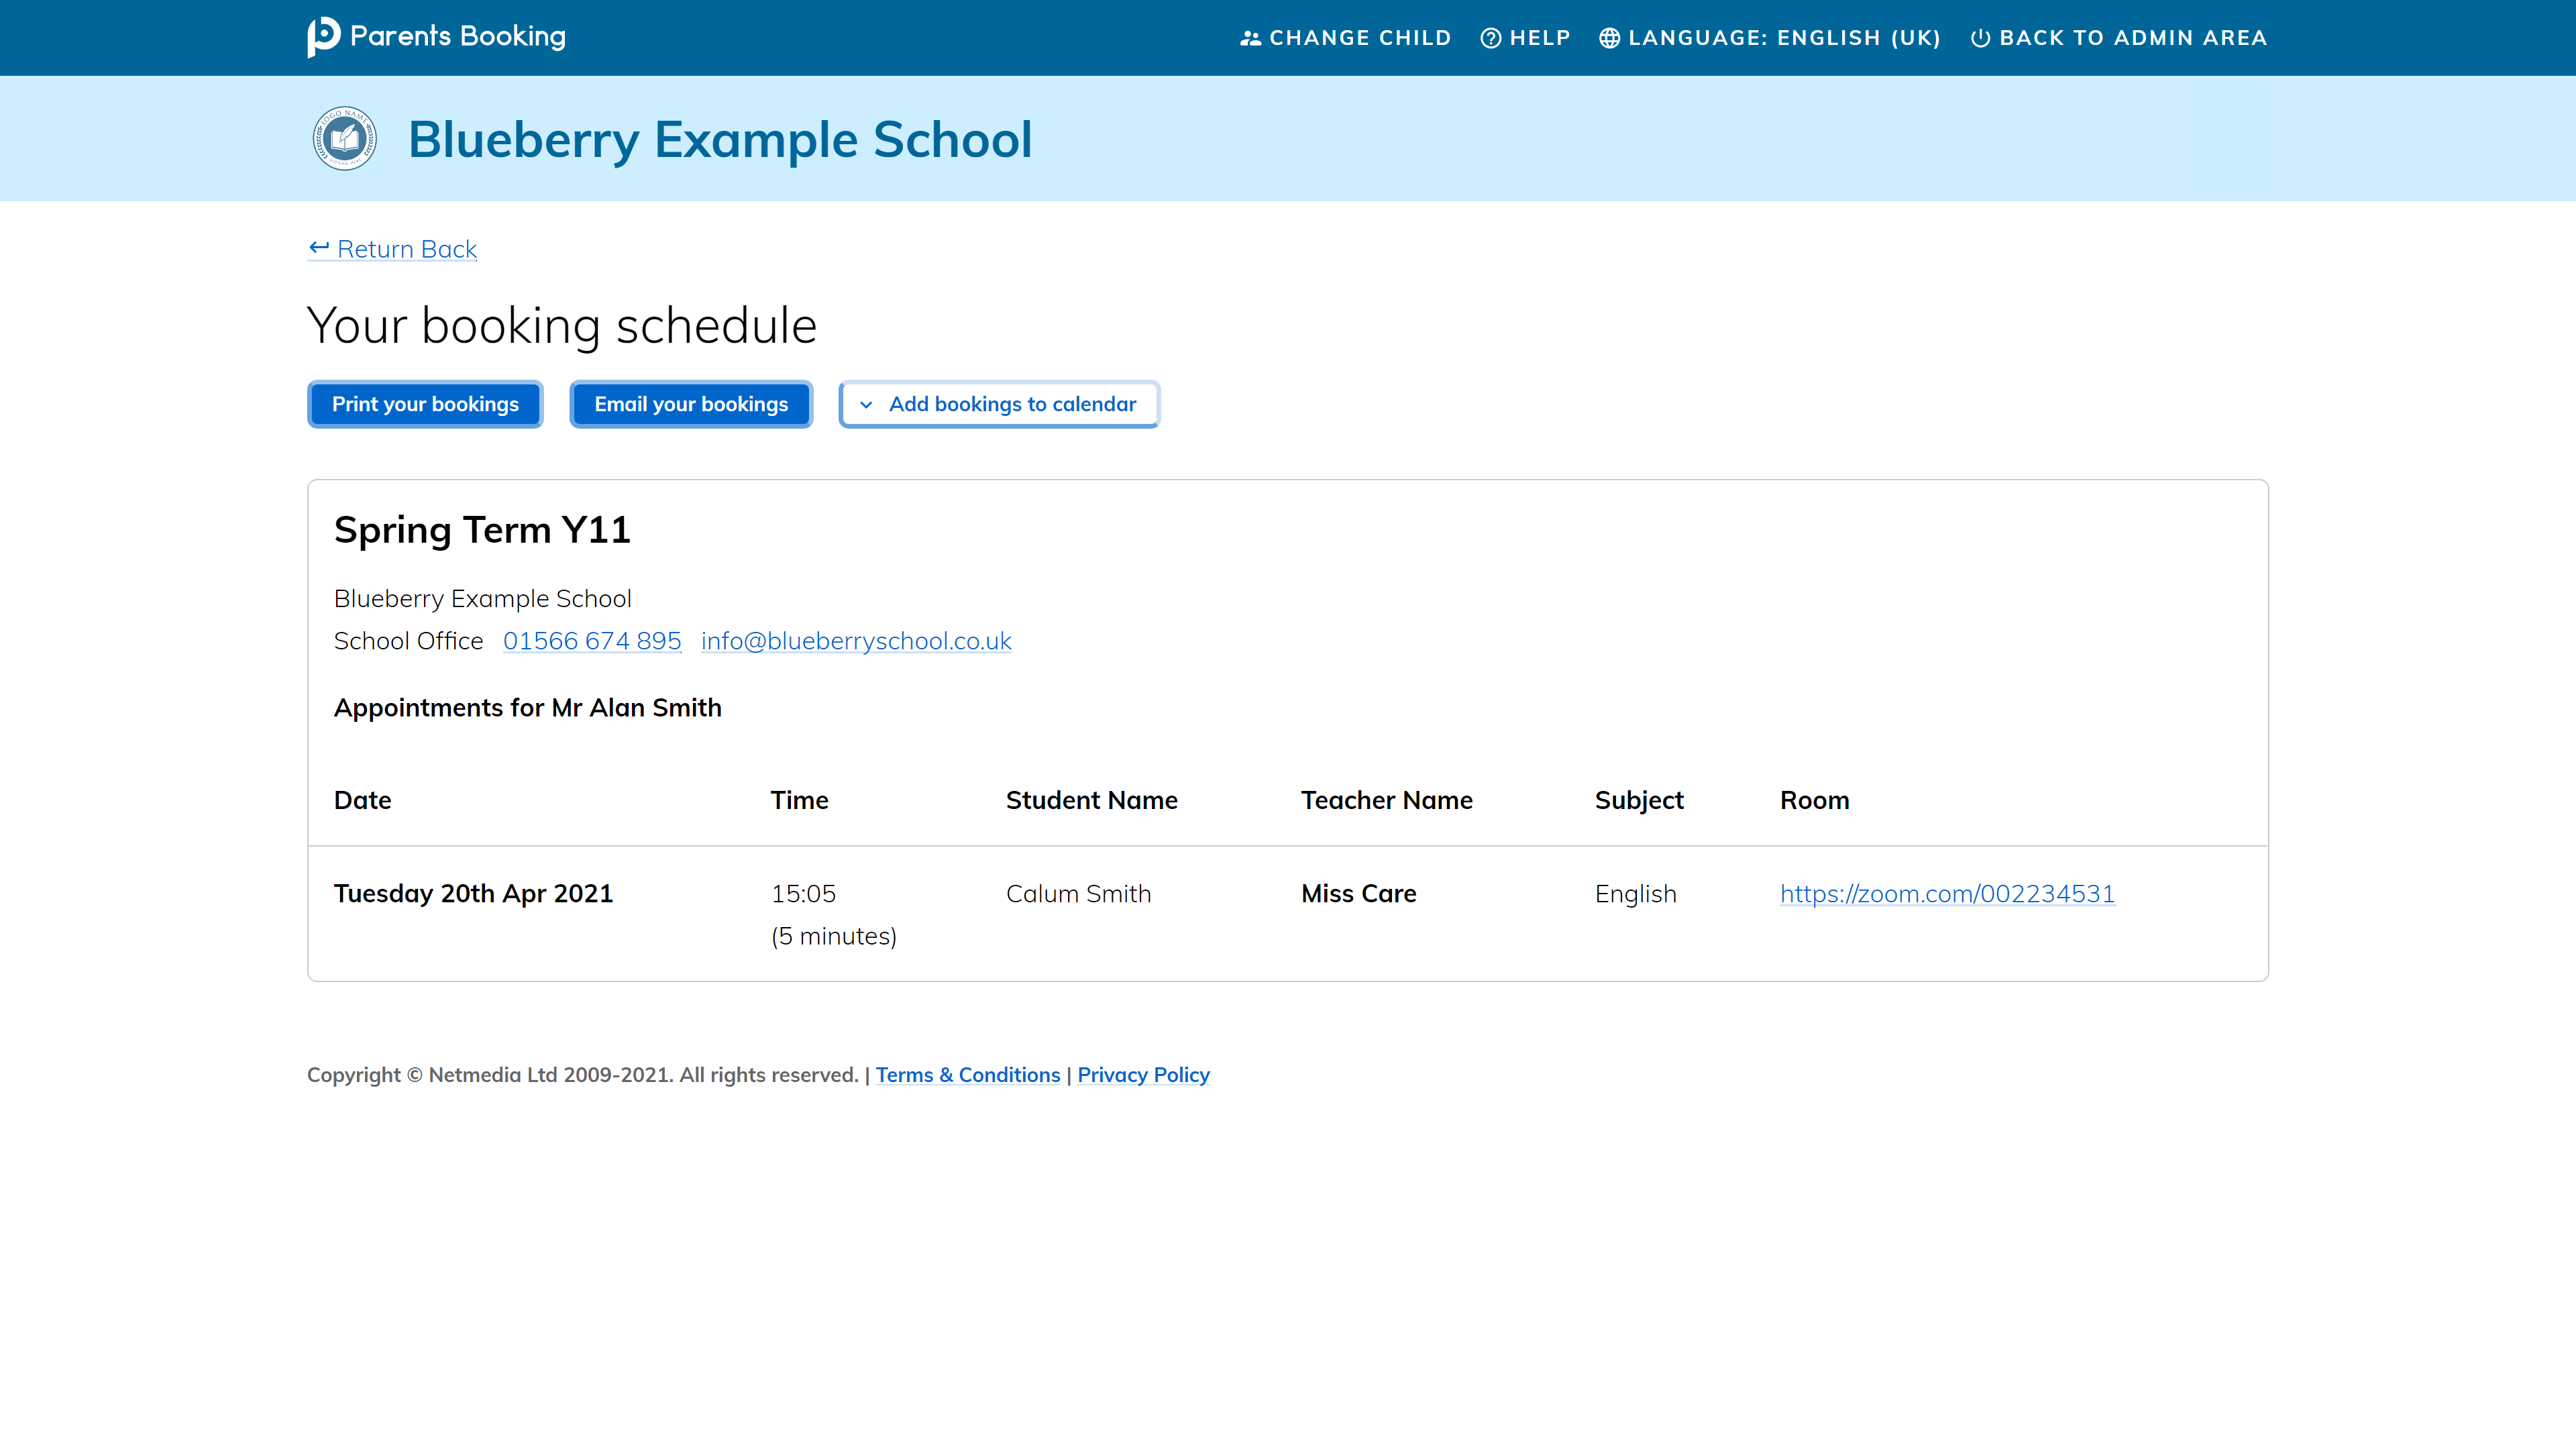
If you add the video room URL to your teachers before you create your parents’ evening, no other steps are required. The video meeting links will be shown on parent schedules.
BUT
If your parents’ evening has been created before you add these video room URLs to the Teachers page, you will see a red Notifications banner and you should click this and tick your parents’ evening and ‘Apply’ the changes, so that the parents’ evening knows about these video room URLs. Alternatively press the ‘Update’ button in Dashboard > Options > Edit the Teachers page.
You can check the the video meeting links have ‘imported’ into your parents’ evening by going to the ‘Advanced Settings (Rooms, Minutes, etc)’ button/page.
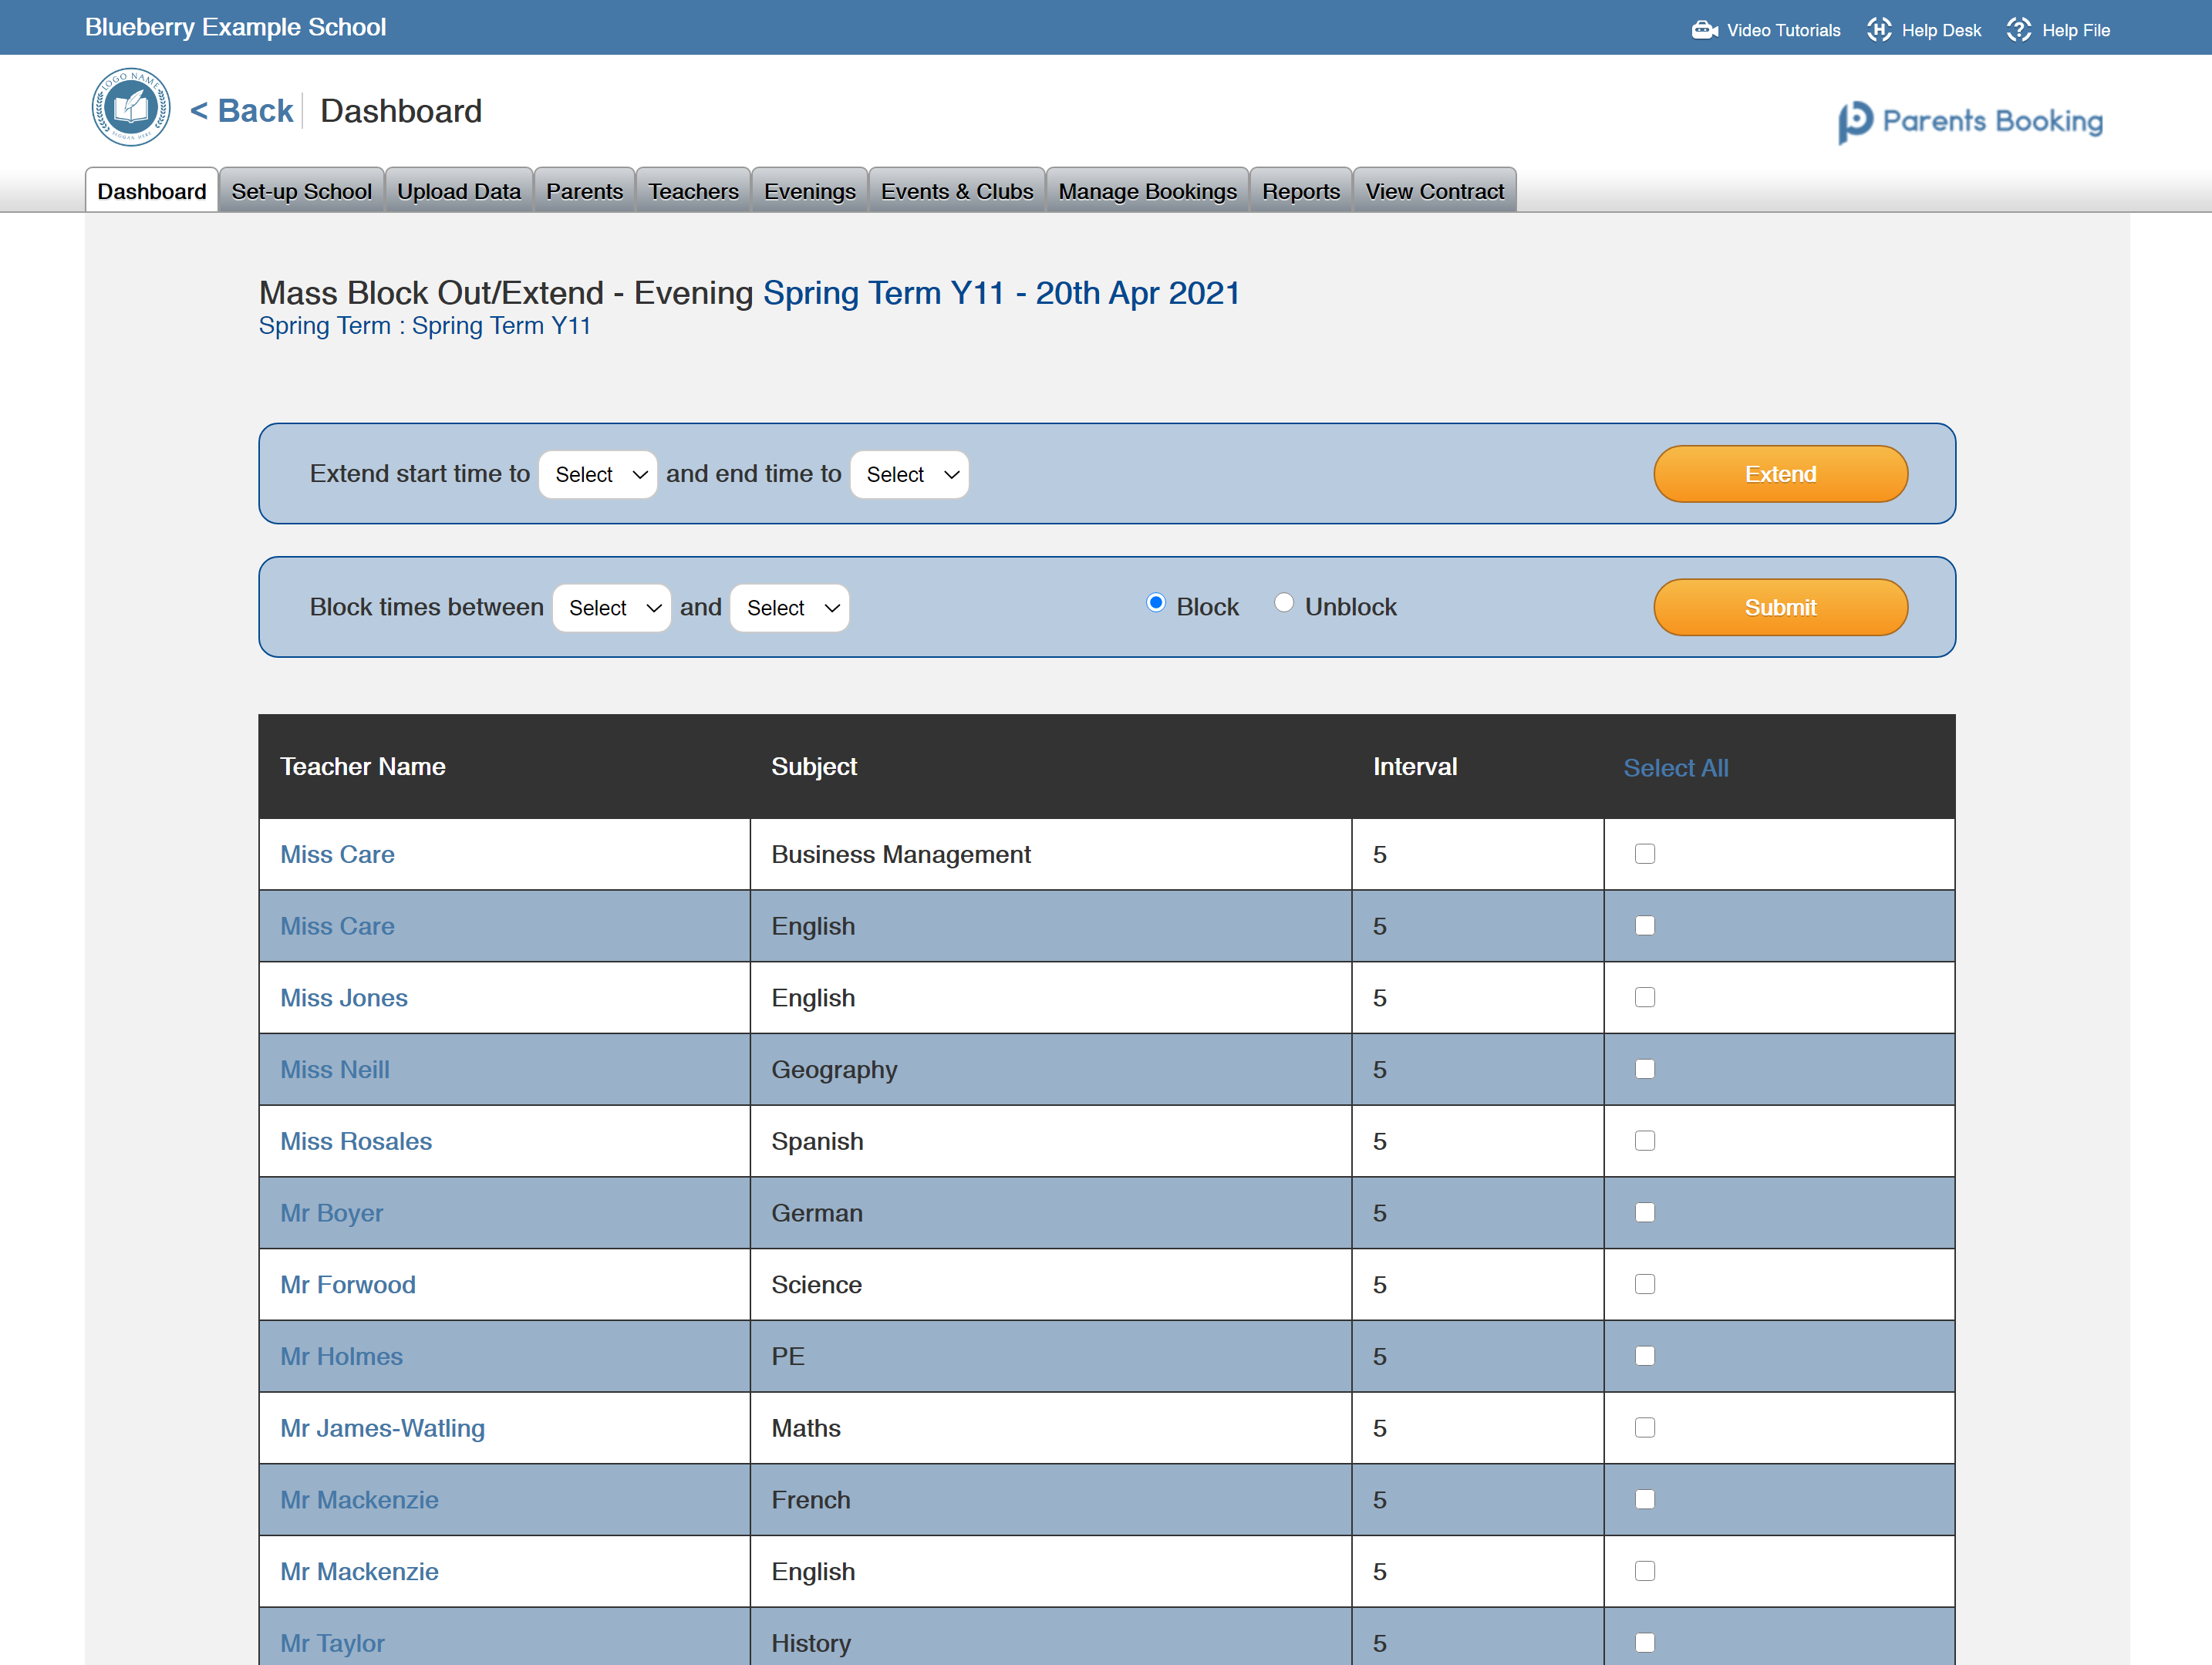
One of the new features in Parents Booking’s most recent release allows administrators to add breaks and extend appointments for groups of teachers, at once, in just a few clicks. This saves the administrator from having to make these changes teacher-by-teacher, and it’s something both simple and effective that we’ve found schools have been looking for recently.
Once you have a parents’ evening set up, find this functionality at: Dashboard > Options > Print, Email, Block Out and Extend Teachers > Mass Block/Extend.
Recent Comments